


Alright, content creators 🎨
Let's chat. We all know that the world of content creation is as glittery as it's chaotic. One moment you're basking in the glory of the perfect post, and the next? Drowning in a sea of schedules, post drafts, and oh-so-many platforms... I've been there. And if you’re anything like me, you’ve probably had your fair share of “Oops, forgot to post that!” moments 🤯
But what if I told you there's a way to sprinkle some data visualization magic into this chaos? Yep, you heard that right. Let's build ourselves a lifesaver. A content management plugin to be precise. And the best part? No faffing about complex data inputs. Just simple code, easy data visualization, and some real fun on the way.
Ready?
Creating our content table
Okay, this is where things get spicy! We’re about to create a table to store all our fresh awesome content on Outerbase. Think of it as your personal digital wardrobe, but for content.
CREATE TABLE content (
    id INTEGER PRIMARY KEY AUTOINCREMENT,
    image TEXT,
    content_title TEXT,
    content_caption TEXT,
    content_link TEXT,
    is_posted BOOLEAN
);
With this, every piece of content gets its own special ID. Quite fancy, huh? Plus, columns for images, titles, captions, links, and a cheeky little boolean to track if a content piece is posted.
Our plugin functionality
These are the key attributes that our plugin is watching for changes:
var observableAttributes = [
    "cellvalue",
    "rowvalue",
    "tablevalue",
    "tableschemavalue",
    "databaseschemavalue",
    "configuration",
    "metadata"
];
Event constants
These constants help our plugin know what kind of action to take:
var OuterbaseEvent = {
    onSave: "onSave",
};

var OuterbaseColumnEvent = {
    onEdit: "onEdit",
    onStopEdit: "onStopEdit",
    onCancelEdit: "onCancelEdit",
    updateCell: "updateCell",
};

var OuterbaseTableEvent = {
    updateRow: "updateRow",
    deleteRow: "deleteRow",
    getNextPage: "getNextPage",
    getPreviousPage: "getPreviousPage"
};
Configuration & event handling
The OuterbasePluginConfig_$PLUGIN_ID class is where we define and initialize our plugin's properties. The triggerEvent function allows us to notify other parts of our application when something important happens in our plugin:
var triggerEvent = (fromClass, data) => {
    const event = new CustomEvent("custom-change", {
        detail: data,
        bubbles: true,
        composed: true
    });
    fromClass.dispatchEvent(event);
}
Table view
The OuterbasePluginTable_$PLUGIN_ID class is responsible for displaying our content:
class OuterbasePluginTable_$PLUGIN_ID extends HTMLElement {
    // ... [Properties and Methods of the table view class]
}
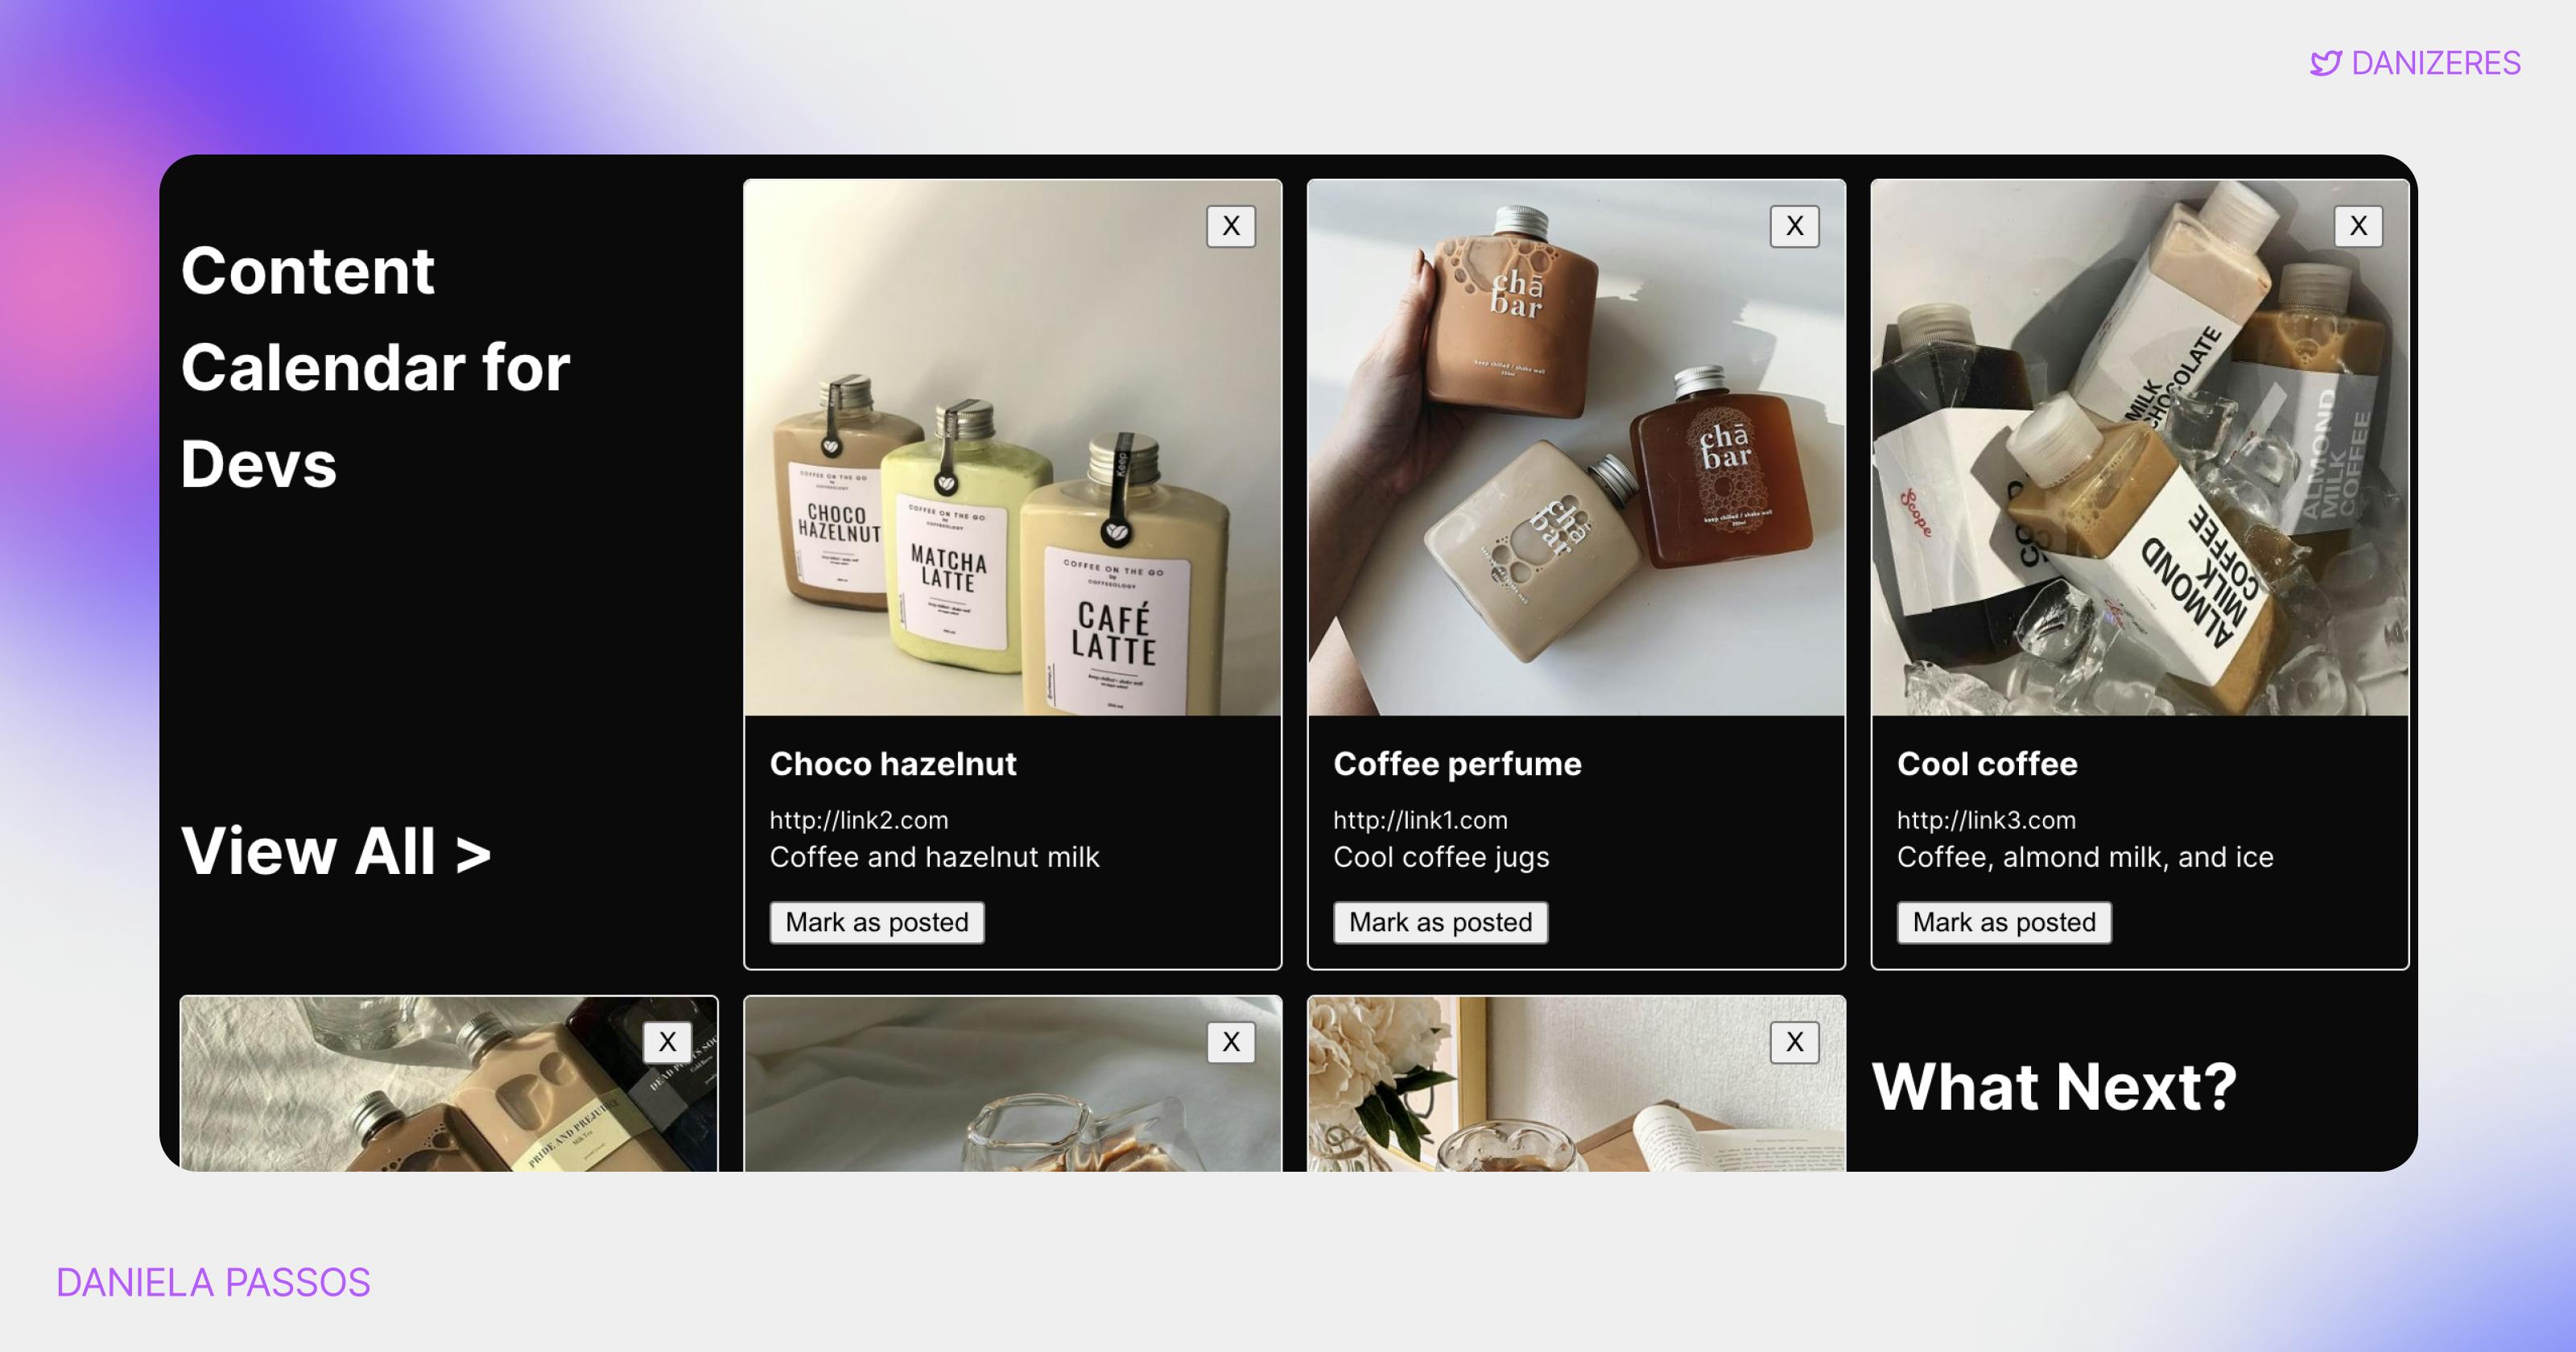
Within the render function in our OuterbasePluginTable_$PLUGIN_ID class, we dynamically generate the grid view for our content. The function takes the current configuration and table values, and then populates the grid. Additionally, there are controls for navigating between pages and handling content actions, such as marking a content piece as posted or deleting it.
Configuration view
With OuterbasePluginConfiguration_$PLUGIN_ID, you can adjust the plugin to fit their needs.
Within the render function of the OuterbasePluginConfiguration_$PLUGIN_ID class, we generate a configuration interface where users can map the content attributes to the appropriate columns from the table. Here is the structure you can use to build on top of:
render() {
    let sample = this.config.tableValue.length ? this.config.tableValue[0] : {};
    let keys = Object.keys(sample);

    this.shadow.querySelector('#configuration-container').innerHTML = `
        <div style="flex: 1;">
            <!-- Configuration controls for mapping attributes -->
        </div>

        <div style="position: relative;">
            <!-- Preview card showing how the content will be displayed -->
        </div>
    `;
}
Adding the plugin to Outerbase
Alright, so you've just put together a wicked plugin, and you're itching to see it in action on Outerbase. Let's get that bad boy up and running, shall we?
So, first things first, Outerbase isn't just any old database tool. These guys are out here trying to change the game. They've looked at those boring spreadsheet grids and thought, "Nah, we can do better." And so, they've given us the power to mess around and whip up some cool plugins to make our data dance 🕺🏻
Imagine swapping out those endless rows of text for a splash of images or dynamic cards that actually make your data fun to look at. Yep, that's the magic of Outerbase plugins.
You've already got your plugin code, right? Cool. That’s the hard bit done. Here's the step-by-step on how to get it into Outerbase:
Head to your dashboard ✨
Fire up Outerbase and head straight to your dashboard. Look out for the "Explore marketplace" under "Installed Plugins".Custom Plugin time 🤌🏽
There's a "Custom Plugin" button just waiting for you. Click it. Give your plugin a cool name and then drop in your code.Get visual 💃
Dive into your Base project. Click on that table you've been dying to view in a new way. There's a "Table view" button chilling in the top right. Click it, choose your new plugin, set up any variables you need, and boom – you're in a whole new data visualization world.
And that's it! You've just leveled up in your content management and Outerbase experience 🎉

Have fun, and remember: data visualization and dashboards do not have to be boring.
With the full code snippets in place, we've constructed a content management plugin tailored for content creators. This plugin allows users to manage their content efficiently, providing both a table view and a configuration view.
That is it for this article, thanks for reading! ⚒️